How to Label Clothes for Nursing Home
As our loved ones transition to nursing homes, it becomes essential to ensure that their clothes are properly labeled. This small but crucial task can make life more organized for both the residents and the nursing home staff. In this article, I will walk you through the process of labeling clothes for a nursing home, offering practical tips and examples to make the task straightforward.
Why Labeling Matters
Labeling clothes may seem like a minor detail, but in a busy nursing home environment, it can make a significant difference. Here’s why:
1. Easy Identification
Imagine a bustling laundry room with multiple residents’ clothes being washed simultaneously. Without proper labels, identifying and sorting clothes becomes a challenging puzzle. Labels ensure that each item finds its way back to its rightful owner effortlessly.
2. Personalized Care
Labeling extends beyond practicality; it fosters a sense of personalization. Knowing whose clothes belong to whom allows the nursing home staff to provide more individualized care. For instance, if Mrs. Johnson prefers softer fabrics, her labeled clothes will guide caregivers in selecting suitable options.
Choosing the Right Labels
Now that we understand the importance of labeling, let’s explore the various options available:
1. Sew-In Labels

Sew-in labels are classic and reliable. These small tags can be discreetly attached to the inside collar or waistband of garments. Opt for labels with clear, bold fonts and allergy icons if needed. Here’s an example:
Label: Mrs. Smith
Allergy: Latex
2. Iron-On Labels
Iron-on labels offer a fuss-free alternative. Simply apply them using a household iron, and they adhere securely to the fabric. Make sure to choose labels that withstand multiple washes to ensure durability.
Label: John Doe
3. Stick-On Labels
For a quick and easy solution, stick-on labels are ideal. They adhere well to most fabrics and are customizable. Ensure that the adhesive is strong enough to withstand regular washing.
Label: Emily’s Sweater
4. Permanent Markers
In a pinch, permanent markers can be a simple yet effective labeling tool. Write directly on the care tags or discreetly on the clothing itself. However, be mindful of the marker’s compatibility with the fabric.
Label: Grandpa’s Jacket
What to Include on Labels

A well-labeled item should convey essential information without being overwhelming. Here’s what you should include:
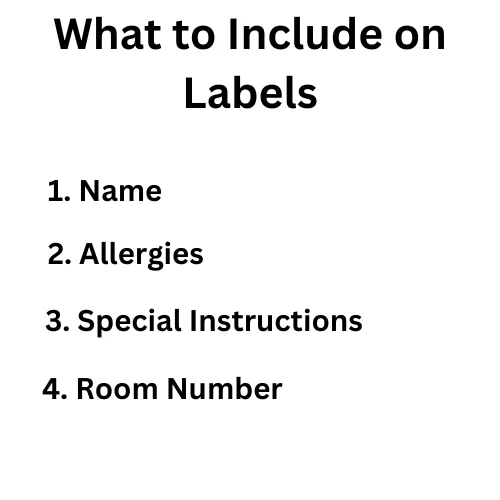
1. Name
The resident’s name is the primary identifier. Ensure the font is clear and large enough for easy reading.
2. Allergies
If the resident has allergies, especially to specific fabrics or detergents, include this information. This ensures that caregivers can take necessary precautions.
3. Special Instructions
Any special instructions, such as preferred washing settings or garment-specific care, should be clearly mentioned.
4. Room Number
Adding the room number helps the nursing home staff easily return clothes to the correct resident.
Labeling Process

To label clothing for nursing homes yourself, start with durable and easy-to-read labels. Use fabric markers or iron-on labels that withstand frequent washing. Clear and bold labeling is crucial for legibility, ensuring staff can easily identify the owner of each garment.
Consider including the resident’s name on the label, using simple fonts for readability. For instance, you might write “John Doe” in clear, large letters. Avoid complicated designs or symbols that may cause confusion. Simple, straightforward labels are effective for quick recognition.
Separate and categorize clothing by type, such as shirts, pants, and undergarments. This organization simplifies the labeling process, making it more efficient. For example, create separate labels for shirts and pants to minimize mix-ups and streamline sorting.
Attach labels on the inside collar or waistband where they’re easily visible but won’t irritate the wearer. This placement ensures the labels remain intact during washing and won’t bother the residents. Additionally, choose labels that are soft and comfortable against the skin.
Regularly check and replace labels as needed, especially after laundry cycles, to maintain clear identification. Over time, labels may fade or peel. Consistent monitoring helps prevent confusion and ensures that residents’ clothing remains appropriately labeled.
Now, let’s break down the actual process of labeling clothes step by step:
Step 1. Gather Supplies
Collect all necessary labeling supplies, whether it’s sew-in labels, iron-on labels, stick-on labels, or permanent markers.
Step 2. Set Up a Comfortable Workspace
Choose a well-lit and comfortable space to work. Lay out the clothes neatly, ensuring you have enough room to maneuver.
Step 3. Follow Labeling Instructions
Carefully follow the instructions provided with the chosen labeling method. Whether sewing, ironing, sticking, or marking, precision is key.
Step 4. Prioritize Outerwear
Start by labeling outerwear like jackets, sweaters, and coats. These items are more likely to be removed and can easily end up misplaced.
Step 5. Check Labels Regularly
As time passes, clothing labels may fade or become illegible. Regularly check and replace labels to maintain their effectiveness.
Tips for Maintaining Labeled Clothes
Labeling is an ongoing process, and maintaining the labels ensures their continued usefulness.
Here are some tips:
1. Check Labels After Each Wash
Clothes go through a lot in the washing machine. Check labels after each wash to ensure they remain intact and readable.
2. Use Durable Labels
Invest in quality labels that withstand frequent washing and the wear and tear of daily use.
3. Educate Caregivers
If possible, provide a quick guide to the nursing home staff on the importance of the labels and what information they convey.
How much does it cost to label clothing for nursing homes?
| Label Type | Cost Range | Details |
|---|---|---|
| Sew-on Labels | $0.50 – $2 | Durable labels stitched onto clothing. |
| Iron-on Labels | $0.20 – $1 | Convenient labels applied using heat. |
| Customization | Variable | Adding names or logos may incur extra costs. |
| Bulk Orders | Cost reduction | Larger quantities often result in discounts. |
Labeling clothing for nursing homes can vary in cost depending on factors like the type of labels, quantity, and customization. Basic sew-on labels typically cost around $0.50 to $2 per label. These are simple, durable labels that can be stitched onto garments. Iron-on labels are another option, usually priced between $0.20 and $1 each. While convenient, they may not be as long-lasting as sew-on labels.
Customization, such as adding the resident’s name or the facility’s logo, can increase costs. Some companies charge extra for each character or for the design process. For instance, if you’re adding a name to each label, the cost may rise by a few cents per character.
Bulk orders often result in lower costs per label. Purchasing labels in larger quantities can lead to discounts, reducing the overall expense. For instance, ordering 100 labels may cost less per label than ordering 20.
Conclusion
In conclusion, labeling clothes for a nursing home is a simple yet impactful task. It not only facilitates the smooth functioning of daily activities but also contributes to the comfort and well-being of residents. By choosing the right labels, including essential information, following a systematic process, and maintaining labels over time, you can ensure that your loved ones’ clothes are always in the right hands.

